Hey, listen… In the land of virtualization and containerization technologies, LXD stands out for its peculiar approach to managing system containers and virtual machines. Developed by Canonical (yep, the same guys who developed Ubuntu Linux), LDX offers a powerful and flexible solution for deploying and managing lightweight containers as well as virtual machines, providing an easy and efficient experience for users and administrators.
What is LXD
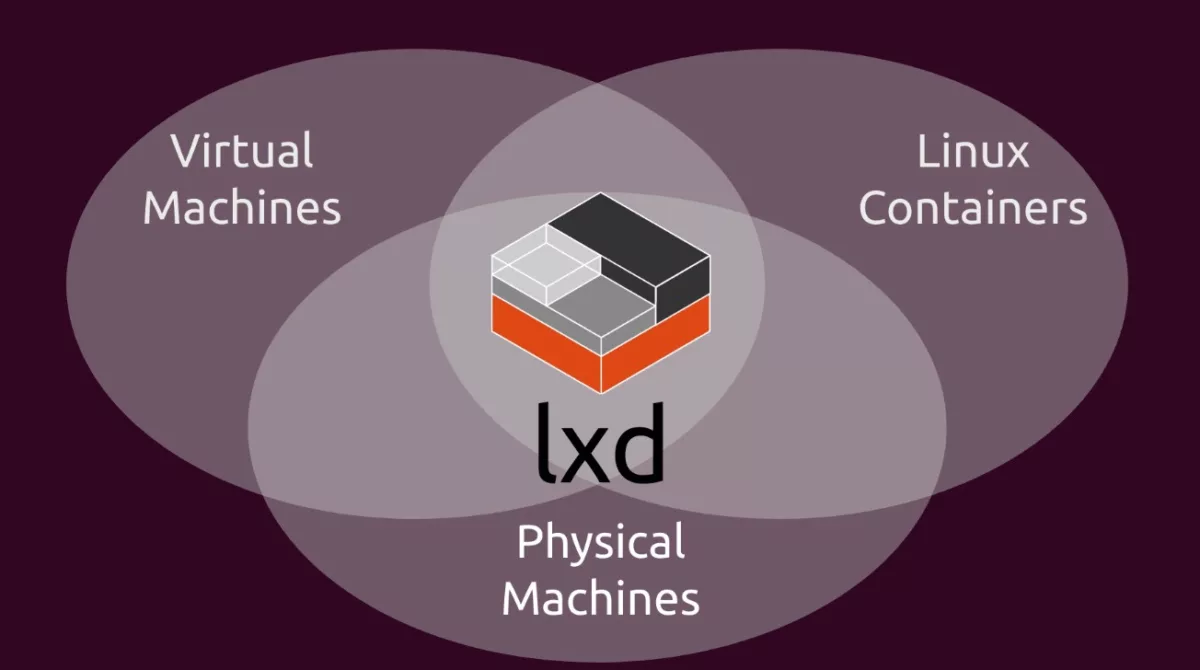
LXD, pronounced “lex-dee,” is a container and virtual machine manager that extends the capabilities of the Linux container runtime (LXC). While LXC focuses on process containers, LXD adds a layer of management for system containers and virtual machines. This combination makes LXD a versatile tool for deploying and managing applications across a variety of environments. Read more in the docs.
Is LXD not what you were expecting? Maybe posts like Deploying a Docker Service Stack and How to install Portainer.io may help you!
System Containers
System containers in LXD provide an environment that is closer to a traditional operating system. Unlike application containers like Docker, which encapsulate a single process and its dependencies, system containers encapsulate an entire operating system user space. This makes system containers ideal for running services or applications that require a more complete environment.

LXD’s system containers share the kernel with the host system, which allows for improved performance and resource utilization. With LXD, users can deploy system containers with various Linux distributions, providing flexibility and compatibility for various applications.
Virtual Machines (VM)
LXD extends its capabilities beyond system containers by integrating virtual machine management. This means users can run both containers and virtual machines side by side on the same host. The virtual machines in LXD provide hardware virtualization, offering a level of isolation comparable to traditional hypervisors.

LXD’s virtual machines are lightweight and resource-efficient, allowing users to achieve a balance between performance and resource utilization. Users can choose from a variety of operating systems to run as virtual machines, expanding the range of applications that can be hosted on an LXD-managed infrastructure.
You should use a system container to leverage the smaller size and increase performance if all the functionality you require is compatible with the kernel of your host operating system. If you need functionality that is not supported by the OS kernel of your host system or you want to run a completely different OS, use a virtual machine.
LXD uses qemu to provide the virtual machine functionality and support fewer features than containers. At the time I’m writing this post, the plan is to support the same set of features for both instance types in the future. Check the CONDITION column in this table to see which features are available for virtual machines.
Getting Started
Installation
You can install LXD in many ways, from source code to distribution package, but the easiest one is by using the snap package and it is the mode I’ll show. You can find an install method to suit yourself here.
I’m using Ubuntu Linux so the commands may differ to your Linux distribution but I’m sure you’ll find equivalent commands.
Before installing LXD, snapd must be installed in your system. To check if snapd is installed run this code:
snap version
If the above command returns an error, run the following line to install the latest version of snapd:
sudo apt update && sudo apt install snapdThe last line should install snapd. Now let’s proceed and install LXD with the following command:
sudo snap install lxdThis command should begin to download and install the LXD snap package.
Initial Configuration
LXD must be initialized before use. You can initialize with the default settings or get a bit interactive.
The default initialization can be done by running this command:
sudo lxd init --minimalIf you need some customization, you just run:
sudo lxd initThe initialization tool will ask for a bunch of options as shown below.

LXD is ready to use after any of these initializations.
Launch Instances
Creating a system container with LXD involves selecting a Linux distribution and specifying configuration options. LXD provides a rich set of commands for managing containers, including starting, stopping, and monitoring their status. Users can also customize container configurations, such as resource limits and storage options.
LXD can load images from different servers like Docker does but for this post, I’ll use the official image repository: ubuntu: (the trailing colon is not a mistake!)
To list all the available images from the repository run:
lxc image list ubuntu:This command will spit out a list of images and some relevant info like the image size, its architecture and type.

Read more about LXD images here.
Launching a container
Now let’s launch a Ubuntu 22.04 container called ubuntu-container with the following command:
sudo lxc launch ubuntu:22.04 ubuntu-containerThe command should download the Ubuntu 22.04 image and unpack it before returning so it could take a while. If you launch another Ubuntu 22.04 container it’ll return faster because the image will be cached.
LAUNCHING A Virtual Machine
To launch a virtual machine the procedure is almost the same as used to launch a container. You only need to add a parameter to the previous command:
sudo lxc launch ubuntu:22.04 ubuntu-vm --vmAgain the command should take a while to return because the VM image is not cached. Even though the image name is the same (ubuntu:22.04) for a system container and a virtual machine, LXD downloads a slightly different image for a virtual machine.
Inspecting Instances
Run the following command to list all the created instances:
sudo lxc list
This command shows all the configured instances (container or VM), it’s almost the same output as docker ps -a.
Now to “inspect” the instances run the command:
sudo lxc info ubuntu-containerThe output should be something like this:
Name: ubuntu-container
Status: RUNNING
Type: container
Architecture: x86_64
PID: 83034
Created: 2023/12/28 16:17 -03
Last Used: 2023/12/28 16:17 -03

Resources:
  Processes: 35
  Disk usage:
    root: 8.95MiB
  CPU usage:
    CPU usage (in seconds): 24
  Memory usage:
    Memory (current): 118.27MiB
    Memory (peak): 239.32MiB
  Network usage:
    eth0:
      Type: broadcast
      State: UP
      Host interface: veth9a3bd08b
      MAC address: 00:16:3e:77:4a:d1
      MTU: 1500
      Bytes received: 333.94kB
      Bytes sent: 22.56kB
      Packets received: 446
      Packets sent: 232
      IP addresses:
        inet:  10.69.160.44/24 (global)
        inet6: fd42:723a:10e:bfb7:216:3eff:fe77:4ad1/64 (global)
        inet6: fe80::216:3eff:fe77:4ad1/64 (link)
    lo:
      Type: loopback
      State: UP
      MTU: 65536
      Bytes received: 1.61kB
      Bytes sent: 1.61kB
      Packets received: 16
      Packets sent: 16
      IP addresses:
        inet:  127.0.0.1/8 (local)
        inet6: ::1/128 (local)
Now the same command but targeting a VM:
sudo lxc info ubuntu-vmAnd the output is almost the same.
Name: ubuntu-vm
Status: RUNNING
Type: virtual-machine
Architecture: x86_64
PID: 99332
Created: 2023/12/28 16:23 -03
Last Used: 2023/12/28 16:23 -03

Resources:
  Processes: 18
  Disk usage:
    root: 8.29MiB
  CPU usage:
    CPU usage (in seconds): 19
  Memory usage:
    Memory (current): 374.46MiB
  Network usage:
    enp5s0:
      Type: broadcast
      State: UP
      Host interface: tap4f729048
      MAC address: 00:16:3e:22:67:ec
      MTU: 1500
      Bytes received: 330.75kB
      Bytes sent: 25.03kB
      Packets received: 418
      Packets sent: 258
      IP addresses:
        inet:  10.69.160.22/24 (global)
        inet6: fd42:723a:10e:bfb7:216:3eff:fe22:67ec/64 (global)
        inet6: fe80::216:3eff:fe22:67ec/64 (link)
    lo:
      Type: loopback
      State: UP
      MTU: 65536
      Bytes received: 8.34kB
      Bytes sent: 8.34kB
      Packets received: 104
      Packets sent: 104
      IP addresses:
        inet:  127.0.0.1/8 (local)
        inet6: ::1/128 (local)
Here are some of the most common commands to interact with LXD instances:
sudo lxc start ubuntu-container # to start the instance
sudo lxc stop ubuntu-container # to stop the instance
sudo lxc delete ubuntu-container # to remove the instance (if it is stoped, use -f otherwise)
Interacting With Instances
You can interact with your instances by running commands (including an interactive shell) or accessing the files in the instance.
To run bash into ubuntu-container, run the command:
sudo lxc exec ubuntu-container -- bashThis command will run the bash session of ubuntu-container and you can use it as a normal remote terminal. You also can execute programs and do not keep a bash session open. Try something like lxc exec ubuntu-container -- apt-get update to update the system packages. Read more about running programs here.
Copying files between host and guest is a piece of cake. To copy files from the container, just run:
sudo lxc file pull ubuntu-container/etc/hosts /tmp/To copy a file from the host to the container, run:
sudo lxc file push /tmp/hosts ubuntu-container/etc/hostsManage snapshots
You can create a snapshot of your instance, which makes it easy to restore the instance to a previous state.
Let’s create a snapshot with:
sudo lxc snapshot ubuntu-container testTo confirm the snapshot was created successfully, run:
sudo lxc list ubuntu-container
sudo lxc info ubuntu-container
The first command should show the snapshot count at the last column and the second command should show a table with snapshot info at the bottom.
Snapshots:
+------+----------------------+------------+----------+
| NAME |       TAKEN AT       | EXPIRES AT | STATEFUL |
+------+----------------------+------------+----------+
| test | 2023/12/30 22:46 -03 |            | NO       |
+------+----------------------+------------+----------+
To restore the snapshot, run the command:
sudo lxc restore ubuntu-container testYou can delete the snapshot by running the following:
sudo lxc delete ubuntu-container/testLearn how to use snapshots to create instance backups here.
Configure Instances
It is possible to configure instances and define many options like RAM quota and CPU limiting. You can find the options here.
For instance, let’s run another instance with some configurations
sudo lxc launch ubuntu:22.04 limited --config limits.cpu=1 --config limits.memory=192MiBThis will create a “limited” container and you can inspect the instance with
sudo lxc config show limitedYou’ll get something like:
architecture: x86_64
config:
  image.architecture: amd64
  image.description: ubuntu 22.04 LTS amd64 (release) (20231211)
  image.label: release
  image.os: ubuntu
  image.release: jammy
  image.serial: "20231211"
  image.type: squashfs
  image.version: "22.04"
  limits.cpu: "1"
  limits.memory: 192MiB
  volatile.base_image: 3770a883c8f5675a9cce69d924e4eeabc96050ab5897e82e8b94bf1970f7aed2
  volatile.cloud-init.instance-id: 95ac9c00-a91d-4e95-856b-ddc7d485326d
  volatile.eth0.host_name: vetha4fcdab1
  volatile.eth0.hwaddr: 00:16:3e:9d:e2:32
  volatile.idmap.base: "0"
  volatile.idmap.current: '[{"Isuid":true,"Isgid":false,"Hostid":1000000,"Nsid":0,"Maprange":1000000000},{"Isuid":false,"Isgid":true,"Hostid":1000000,"Nsid":0,"Maprange":1000000000}]'
  volatile.idmap.next: '[{"Isuid":true,"Isgid":false,"Hostid":1000000,"Nsid":0,"Maprange":1000000000},{"Isuid":false,"Isgid":true,"Hostid":1000000,"Nsid":0,"Maprange":1000000000}]'
  volatile.last_state.idmap: '[{"Isuid":true,"Isgid":false,"Hostid":1000000,"Nsid":0,"Maprange":1000000000},{"Isuid":false,"Isgid":true,"Hostid":1000000,"Nsid":0,"Maprange":1000000000}]'
  volatile.last_state.power: RUNNING
  volatile.uuid: de11342a-d061-476e-a3dd-84248171b398
  volatile.uuid.generation: de11342a-d061-476e-a3dd-84248171b398
devices: {}
ephemeral: false
profiles:
- default
stateful: false
description: ""
You can also update the configuration while your container is running:
sudo lxc config set limited limits.memory=128MiBFind more about instance configurations here.
Conclusion
LXD brings a unique and powerful approach to managing system containers and virtual machines, offering a versatile solution for deploying and managing a wide range of applications. With its focus on performance integration and advanced features like live migration, LXD stands out as a compelling choice for users seeking a unified platform for their container and virtualization needs. It could be an interesting replacement to VirtualBox and Docker installations at once, in development environments.
See ya!